Monday, June 18, 2012

Lasagnia for Vania

Whoa, so obviously I'm not a blogger because it's been 5 months since I last posted a recipe but after a shout out from one of my favs Lani Says, I thought I'd chuck up a post I've been meaning to do for aaaages.

Earlier this year, my Aunty Vania sadly passed away from cancer. She was an amazing, brave woman who was so loved by many of us. Like typical Samoans who have a feed whenever they get together, the majority of the memories I have of her relate to food. Her favorite dinner when she came round to my mum's place was my brother and I's lasagna. I know a lot of people that think they make the best lasagna (which actually sounds like a cool night if anyone's down for a lasagna battle) but this is some epic shit right here as I know my Aunty agreed. The key is definitely getting the sauce right, and don't pike on me and use pre-bottled shit because it's easy enough to do it from scratch and way better. The extras?....Mushrooms, spinach and ham. I know it sounds crazy but trust me, it just works. My dad used to put dollops of sour cream in-between the layers too which is also really good so feel free to give that a go too if you're feeling really game (up yours calorie counter).

So here it is, in memory of my Aunty, Vania Savila.

Lasagnia for Vania
This will feed like 10 hungry people

Tomato Sauce
500g lean beef mince
2 brown onions
4 cloves garlic
1/3 cup Olive oil
1 tsp paprika
1/2 tsp oregano
Salt and pepper
2 cans chopped tomatoes
400g Leggos tomato paste
2 Tbsp brown sugar
12-15 button mushrooms

Heat a splash of olive oil in a frying pan over moderate heat. Chop the onions roughly and cook till transparent. Add the mince and brown well. Crush/finely chop the garlic and add with the paprika,oregano, and a decent spike of salt and pepper. Continue to cook for 1-2 minutes. Add the canned tomatoes, tomato paste and 2 cans of water. Bring to the boil and add the brown sugar and olive oil. Cover and reduce heat to a moderate simmer for about 30 minutes, stirring occasionally and adding a little more water if it gets too thick so it doesn't burn. Wipe the mushrooms and chop roughly. Add to the sauce and cook for a further 10 minutes. The sauce should be relatively thick and chunky so try to cook it down as much as possible if it's too watery. Taste and check your seasoning. 

Cheese Sauce
150g butter
2 heaped Tbsp flour
2 cups Milk
1 cup grated cheese (edam, colby)

Melt the butter in a small saucepan over low heat. Add the flour and stir till combined. Cook for 2 minutes. Add about 1/2 cup of the milk and stir until smooth. Bring to the boil, then add another 1/2 cup milk and bring to the boil again. Continue this process until you've added all the milk. Add the cheese and stir until smooth. 
(Note: if you find the cheese sauce consistency a bit curdled, chuck it in a blender for a minute or two and somehow it really makes a difference to the taste of it too)

You will also need
Lasagna sheets
250g shaved ham
Grated cheese
1 large bag of Spinach
[Take the spinach leaves and boil in salted water until cooked through. Remove from heat, drain, and cool. Squeeze as much water as you can from the spinach with your hands, then put the spinach between paper towels and press to dry it out as much as you can]

To assemble
Take a large deep oven proof tin and put a large scoop of your tomato sauce in the bottom and spread out. Take your lasagna sheets and assemble in a single layer over the top, breaking them into the correct sized pieces as needed. Place a layer of tomato sauce over the pasta. Next up, open up pieces of shaved ham and layer over, then chuck bits of the spinach over that. Drizzle a layer of cheese sauce of over the top. Repeat with the pasta layer and so on, ending with a layer of tomato sauce (You should get about 3 layers of ham and spinach). Pour any remaining cheese sauce over the tomato sauce followed by a couple handfuls of grated cheese. Bake in a 200 degree oven for around 40 minutes or until you can insert a sharp knife through the pasta layers easily. Cool for around 15minutes before serving so the layers stay together better when you try to get it out.


Serve with salad and some tasty carbs and enjoy.


We all miss you Aunty Vans. xx

Monday, January 30, 2012

Mexican Fiesta

The blog has been a little sparse lately- mainly because I've been a bit lazy and going back to the old favs, and also because there's been a baking fail or two which I won't go into. But this will make up for it-trust me.

I've only been over to the states twice, but if somebody could bring Taco Bell here it would be much appreciated, especially at 5 in the morning on the way home from Hitch. A Taco Bell 'chulupa' is a taco where the shell/tortilla is substituted for fried bread. As in roll up your sleeves, kitchen covered in flour, homemade bread. I've struggled with bread making as I've previously mentioned-but these always turn out great so I can't stress enough how much you need to try this. It's a lot of work- and there's a lot of little things going on. If you attempt it for 1 or 2 people, you are probably out of your mind. But it's the kind of recipe that you could get lots of people round, get everyone doing bits and pieces and make a night of it.


So the chulupa consists of:
Deep fried bread (recipe below)
Refried beans
Rice
Meat of your choice (recipe below)
Chilli corn mix (recipe below)
Salad (lettuce, tomatoes, red onions)
Guacamole (recipe below)
Sour cream
Cheese

Four recipes today!!!

Wednesday, January 11, 2012

Smoked salmon pasta with capers

The old man came round for dinner last night and smoked salmon seemed like the way to go. I made smoked salmon pasta a few months ago but tried a recipe and couldn't seem to get the balance between creamy and acidic right. Looking for recipes yesterday, nothing really stood out as what I was looking for, so as I tend to do, I took my fav parts from a few different recipes and combined it to make my own....and holy jeebus was it good.
And it goes a little something like this....

Smoked salmon pasta with capers

50 grams butter
1 brown onion
3 cloves garlic
Salt/pepper
Pinch cayenne pepper (optional)
1/2 tsp dried oregano
1/2 red capsicum
375ml Campbells Fish Stock
1/2 lemon
250ml cream
1/4 cup capers
200g smoked salmon

Your favorite pasta. I got this amazing pappardelle from Nosh a couple of months ago and it looks so preeeetty...
Handful chopped parsley and freshly grated parmesan for garnishing

Melt butter in a frypan over medium heat. Chop the onion finely and cook until transparent. Mince the garlic and add to the pan, frying till lightly browned. Season and add oregano and cayenne pepper. Chop the red pepper finely, add and cook till soft. Add the fish stock and the juice from 1/2 lemon and boil over medium heat until reduced by half. Put the mix in the blender with 50ml cream and blend until smooth.
Put back in the frypan and add the rest of the cream and the capers. Cook down until thickened enough to coat the pasta. Taste...taste....taste! You might need to add more salt, or lemon or cream to get that balance right between the acidic lemon and capers, and the cream.
When done, take off the heat and add the salmon broken into large chunks.
Cook your pasta till al dente and toss through through the sauce.
Serve with a garnish of parsley and parmesan, and a couple of slices of crusty bread.
Yum!!


Saturday, January 7, 2012

Lemon-blueberry layer cake with lemon cream cheese frosting

Welcome to the 2012. I haven't posted in a while with all the holiday madness but I've taken some much needed annual leave so get ready to be bombarded with recipes and tales from my kitchen.
I don't bake for myself. I bake to fill cupcake orders, or for my family, workmates and kids. So my first official day off I decided I wanted to bake something just for me (although my brother and white brother did come over for official taste testing). I had tons of lemons left over from our Christmas house party and had leftover lemon curd from this Christmas breakfast I made for my mum.

I decided while blueberries were in season I wanted to do something with those too hence this idea was born. Blueberries always remind me of my grandparents- who are in fact the coolest people I know. My older sister and I used to spend nearly every school holidays with them growing up. There was a summer spent picking blueberries in the pounding sun day after day. In reality, my grandparents picked them while we lay under the bush trying to get shade and ate them till we made ourselves sick.

My idols
My attempts with layer cakes have always had issues. I am getting better but how people get these things so straight seems to be beyond my amateur skill level, so all my cakes tend to have a gangsta lean. This attempt was average but I can never get the top even. So if you do try this recipe and have any success, please let me know-because this forever frustrates the hell out of me.

Anyway, after all that rambling, the recipe I used was the Magnolia Vanilla Cake recipe, tossed in 2 punnets of blueberries and spread it evenly into 3 round tins. The lemon curd recipe I used was made in a microwave so takes 3 minutes and is found here. So make the curd first and then get it really cold otherwise it squidges out with the weight of the cakes. Layer them up and then put the whole thing in the fridge to set.
I don't use a recipe for my frosting but it's a combination of cream cheese, butter, icing sugar, lemon juice and lemon rind until you get a consistency that's thick and easy to manage. Apparently the tip for layer cakes is to put multiple thin layers on, refrigerating the cake in between coats.


My photos need work, I do realize this. By the time I finished all the layers of frosting, it was a bout 10pm and my dinner guests were hurrying me up.
It didn't turn out perfect looking but this is a great cake if you're looking for something light, fruity and summery.  You could probably put cream cheese frosting on a shoe and I'd be tempted to eat it. I do want to try a layer cake with 8 layers or so but don't hold me to it because my frustration with trying to get it straight will probably result in it being hurled out my kitchen window accompanied by several curse words.
May your 2012 be filled with deliciousness.
You'll be hearing from me again soon
Jen

Thursday, December 22, 2011

Tomato and Basil Spaghetti

F#*k Dr Atkins-I need carbs in my life. We eat a lot of pasta at my house, and feel special cause I'm about to share with you the basic tomato sauce which I use for this simple, light spaghetti, but you can also add meat to for bolognese which also makes what I've been told is the most amazing lasagna ever.

My dad has an Australian-Italian friend who came over and taught him this recipe- however as I tend to do, I've changed it a wee bit and got tips from various cooking shows. Here goes...

Tomato and Basil Spaghetti
Ingredients
1 brown onion
4 large garlic cloves
Salt
Pepper
1 tsp dried oregano
2x 400g can of whole tomatoes
200g tomato paste
1 heaped Tbsp brown sugar
3/4cup extra virgin olive oil
Fresh basil- 12 leaves
Pasta
Freshly grated parmesan

Heat a frypan to medium heat with a swig of olive oil. Chop the onion and cook till soft. The first tip for getting the most flavor out of your sauce is to cook these off as long as you can before the get too brown. You want them to get to a point where you can mash them with the back of your spoon, which usually takes about 10-12 minutes so if they're getting too dark too quickly, you need to reduce the heat. Once the onions are almost to that point, add the finely chopped garlic, oregano, and a decent amount of salt and pepper. Fry this off till the oregano and garlic are fragrant. Add the canned tomatoes, tomato paste and brown sugar. Fill up one of the tomato cans with hot water, add to the pan and bring the sauce to the boil. Add the whole lot of olive oil. It seems like a lot and will sit on the top looking not too attractive but this is the second tip for a flavorful sauce. Reduce the heat to a medium boil and cover. Cook for around 30 minutes, stirring occasionally. You're going to be looking for the oil to first melt into the sauce, then the oil will become a beautiful rich red color and sit on top of the sauce. Cook the sauce down till it becomes relatively thick, and is going the give the pasta a thick coating. Heat a pot of water to a rapid boil. Add a few heaped Tbsp of salt and cook your favorite pasta (I like to use thick spaghetti) till al dente and drain. About 5 minutes before the pasta is ready, chop 8 basil leaves finely and add to the sauce and cook for 5 minutes. Add large spoons of the pasta sauce to the cooked pasta until you've got a good coating on it. Plate up and add a little more of the sauce, more fresh chopped basil and a generous amount of parmesan cheese.


Tip: get yourself a loaf of crusty bread and soak up all this olive oil on the bottom of your plate. It will change. your. life.

Friday, December 16, 2011

Panko-parmesan crusted chicken with mushroom sauce

I first put this meal together a couple of weeks ago when I felt like stuffed chicken breasts but couldn't be assed stuffing it. Now it's one of my absolute favs. I discovered panko (japanese breadcrumbs) after watching lots of cooking shows over the years and now that they have them at the local supermarket, I'm addicted. Tanuki's Cave is one of the bf and I's fav places to eat where they coat almost anything you can think of in panko-and it's delicious.

 Note: do not try this if you're trying to diet. Do try this if you love good food and want something relatively easy to throw together, even though it looks kind of complicated.


There are three parts to this meal:

Roast potatoes with buttered spinach
Washed potatoes (around 3 small potatoes per serve)
1/2 cup flour
1 tsp dried oregano
Fresh spinach (around 6-8 leaves per serve)
Butter
Salt and pepper

Panko-parmesean crusted chicken breasts and
Chicken breasts (1 per serve)
1 cup Panko breadcrumbs
1/4 cup freshly grated parmesan
1 egg
1/2 cup canola oil

Mushroom sauce
1/4 red onion
3 cloves garlic
10 button mushrooms
3 Tbsp dark soy sauce
1/4 cup chicken stock
1/2 cup cream
2 Tbsp water
1 Tbsp cornflour

Cut the potatoes into small similar sized pieces. Put the flour and oregano in a bowl and add salt and pepper. Toss the potatoes through the flour and then shake off the excess. Place in a roasting dish with a generous drizzle of olive oil and bake at 220 degrees until cooked through and crispy. Toss during cooking to make sure they brown evenly. For the spinach, melt some butter in a frypan and sauté the spinach till soft. Season with salt and pepper.


The assembly line
The remaining flour mix can be used for the chicken. Crack the egg into another bowl and mix well. Place the panko into a third bowl with the grated parmesan. Cut the chicken breasts longways into thick strips. Toss through flour mix, followed by egg mix and lastly panko mix. Heat the canola oil in a large frypan on medium heat. To make sure the oil is at the right temperature, tear off a small piece of bread and throw it in. It should brown in about 20-30 seconds. Shallow fry the chicken until golden brown, then place on a paper towel to drain excess oil. Test the largest piece of chicken to make sure it's cooked all the way through and if not, put in the oven at 180 degrees for a few minutes.

For the mushroom sauce, heat a swig of olive oil with a small knob (that's what she said) of butter in frypan. Chop the onions and the garlic finely. Cook the onions till clear then add the garlic and cook till fragrant. Slice up the mushrooms and add to the pan, cooking till soft. Add a good sprinkling of cracked black pepper. Add the soy sauce and the stock and simmer for about 5 minutes before adding the cream. Simmer again for 3-4 minutes. Mix the water and cornflour together with a fork till smooth and add to the sauce. Cook until the sauce thickens.

To assemble, toss the potatoes with the spinach, top with the chicken and pour over lots of mushroom sauce.


This sauce is amazing, and is super good with steak too.

Totally worth the couple of kilos you'll put on after eating it

Wednesday, December 14, 2011

Cookies for Santa- Take one

My father is a cowboy from the states, Idaho to be exact. Therefore a lot of my cooking has been influenced by American recipes. My first baking experiments were going through his American cookbooks  which have a lot of weird stuff in them (there was a chocolate mayonnaise cake that tasted exactly as it sounds and you're right-it wasn't a success). American's do however make the best chocolate chip cookies. Growing up on American cookies- I have to learn you NZ people that the perfect chocolate chip cookie should be chewy and soft almost cake like in the centre.
I've tried many many different recipes in search of the perfect one but today, after not being able to sleep post my 12 hour night shift I decided I needed something sweet. I've been wanting to try Alton Brown's "The Chewy" recipe after reading rave reviews about it so I gave it a go today, putting my own spin on it, and they turned out perfect.
Change 1: Not having made this recipe before, I got to the final stages before adding the chocolate and decided that the mixture was too runny. Therefore I added the extra egg white (that's 2 whole eggs) as well as an extra half a cup of flour.
Change 2: Chocolate chips have oil in them to help them keep their shape. I'm not so interested in that so I always use a king size block of chocolate chopped into reasonably large chunks. Today I used Whittakers dark chocolate because dark chocolate is the best. The result is huge chunks of melted chocolate. Amazing.
Change 3: I also added about half a cup of chopped walnuts to add a bit of texture.

The chilling part is very very important to stop the cookies from spreading too much. 
I suggest doubling the dough and freezing it in balls ready for flash homemade cookies anytime of day. 


Served with a glass of milk, I'm sure Santa will be very happy to get these.

Tuesday, December 13, 2011

The best damn aioli you ever had bitches

I love garlic. I put garlic in fricking everything. I am also one of those annoying "everything with mayo" people. So when I set out to make the best garlic mayo in the world one day, it was a big deal. I must admit there was a huge disaster when I tried to make the mayo myself...by hand...with the bf tipping in the oil and me getting one huge bicep trying to whisk the damn thing in. But of course it ended up in one big "There's something about Mary" type mess. Not pleasant.
I have however in my food quest come up with one of my greatest inventions- the best damn aioli you ever had. So get your pen and paper out and write this shit down. I swear this is amazing and super easy and goes on anything.

The best ever Garlic Mayo recipe
Ingredients
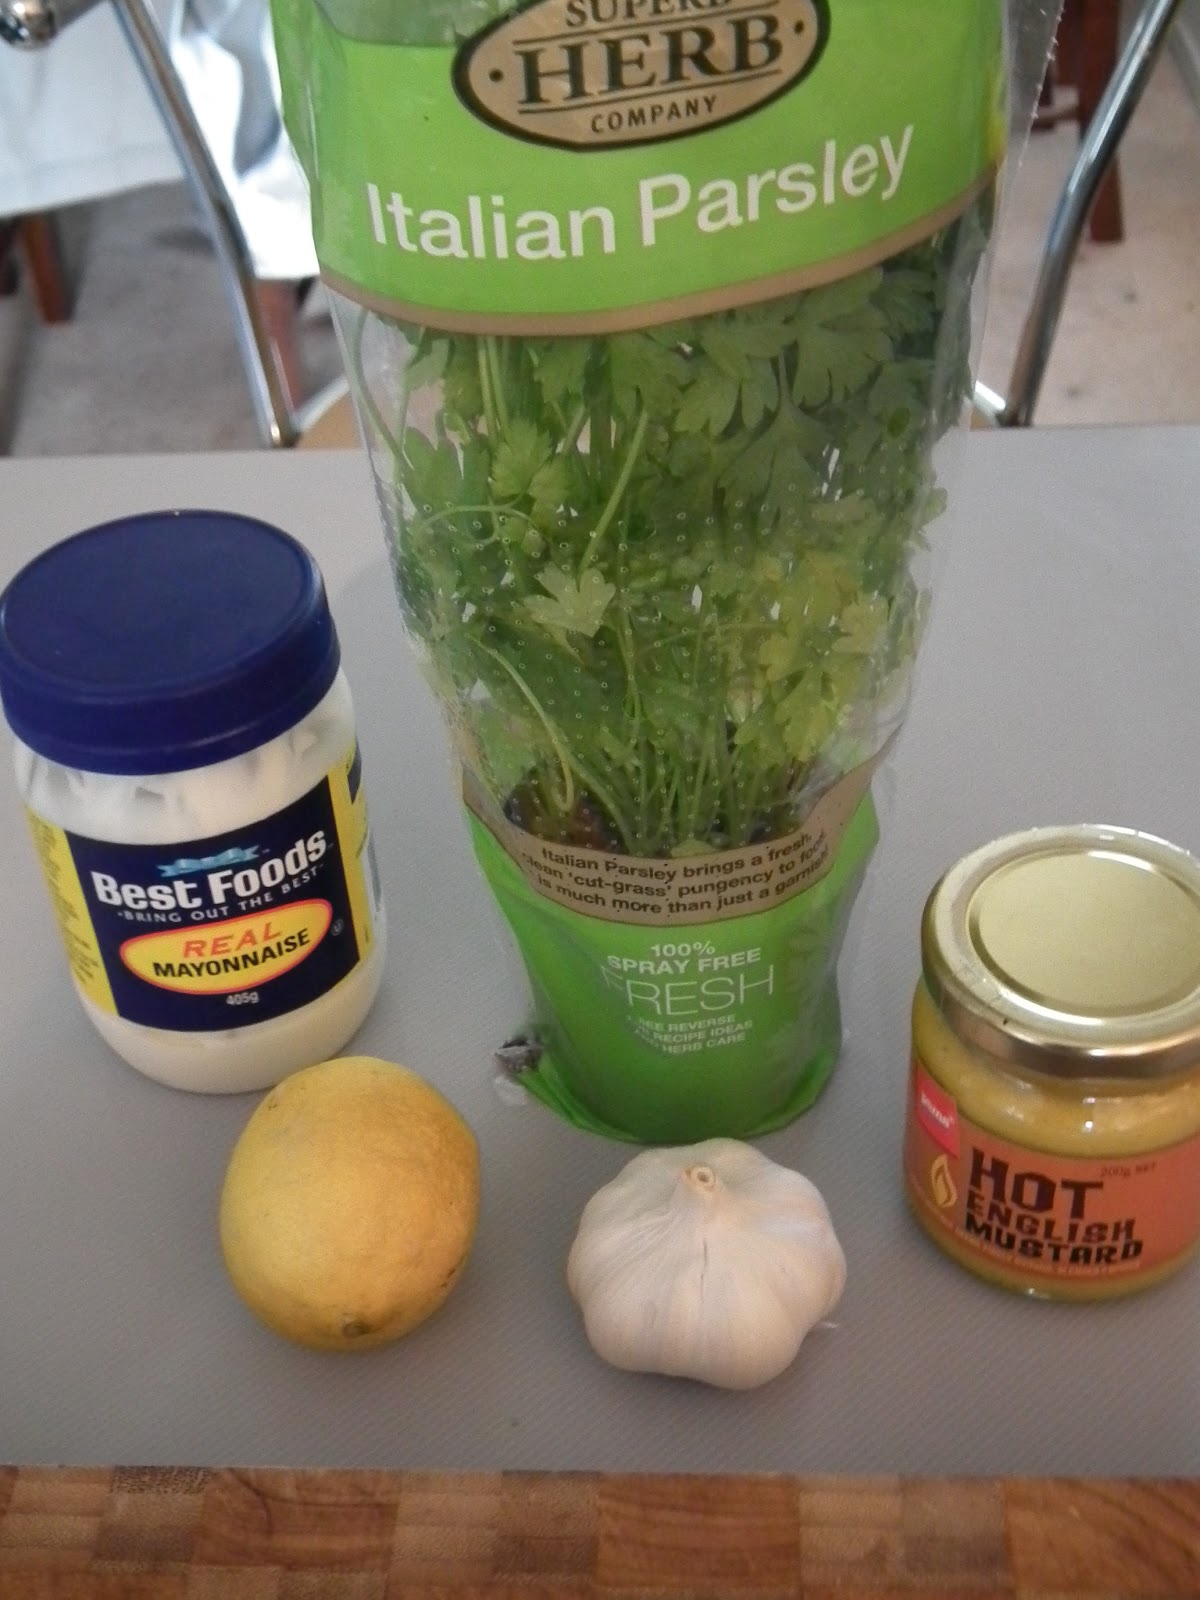
1/2 cup Best Foods Mayo
3 large garlic cloves (can add more or less to taste)
Small handful of italian parsley, coarsely chopped
1/2 lemon
1/2 tsp english mustard
Olive oil
Salt and pepper to taste

Your cooked garlic should look something like this
Heat a frypan with a splash of olive oil on low-medium heat. Peel the garlic cloves and place in the frypan off to the side not in the centre. The goal is to cook the garlic all the way through while trying not to get it too brown. This should take around 5 minutes. When the garlic is soft remove from the heat. Finely chop the softened garlic and then squash it with your knife against the chopping board until it makes almost a paste. Put the mayo into a small bowl with the garlic paste, the mustard, 1 tablespoon of fresh lemon juice and the parsley. Season to taste with salt and pepper. Mix till combined. Place in the fridge for at least 20 minutes.

Garlic paste

I have no idea how this stuff would keep in the fridge because it's always all gone by the end of dinner.

My favourite dish to use this mayo on is beautiful eye fillet sandwiches. I'll do another post on how I cook steak but for now here's how you chuck this all together. For this you will need:

Garlic Mayo a la Operation Yum
Ciabatta rolls
Pieces of good quality eye fillet steak
Parmesean cheese
Rocket lettuce
Olive oil
Salt and pepper

Heat up a frypan with a touch of olive oil on medium high heat. Cut the ciabatta in half and toast lightly under the grill. Season your steak with salt and pepper and olive oil. Sear off in your frypan to your liking (has to be medium rare in my opinion). Allow to rest for at least 5 minutes. Slice thinly (makes it much easier to eat). Fill your ciabatta with the steak, thin slices of parmesean, a handful of rocket and lashings of garlic mayo. YUM!!

Eye fillet sandwich with potato wedges and aioli
TIP: you could totally roast the whole garlic bulb in the oven and then squeeze the cooked garlic in instead but who has time to do that
TIP #2: another definite favourite is to add the garlic to softened butter with parsley. This garlic butter is awesome on steak, or smeared on your favourite loaf of bread (like lonestar only better).

Sunday, December 11, 2011

Dinner at the Argentinians: Bacon ravioli with basil pesto

Had a dinner party with the work girls the other week at my good friend Cece's place. Cece is from Argentina and you are almost guaranteed a fuckin good time when hanging out with her. The girls whipped up an amazing bacon ravioli with basil pesto while I drank Gin and took photos, and we all woke up to our boyfriends trying to get away from our stinky garlic breath :)

 The view from Cece's street. Super jelly.
 And her amazing "bege" garden.
I've never made pasta before because it looks like there's a lot that can go wrong but the girls made it look easy so I'm willing to give it a try in the near future. So although there was no exact recipe involved, here's what went in.

It's beginning to look a lot like Christmas

Cinnamon rolls are definitely a fav of mine but I've always found bread making really difficult (partly because of the fact that i'm impatient and can't be assed waiting for rising times). However I gave this recipe a go after seeing it on one of my favorite blogs Cupcakes and Cashmere and it worked wonderfully. The dough didn't quite go smooth and elastic like it's supposed to so I was bit worried that the bread was going to be a bit tough but it was amazingly soft and delicious. Topped with a cream cheese frosting, this is definitely what I want to wake up to Christmas morning (hint hint Santa). TIP: you could totally chuck the rolls in the fridge overnight after cutting them to delay the second rising stage, and then bring them to room temperature and bake them in the morning. But I reheated mine in the microwave for 30 seconds and they were still extra good.


Wednesday, November 30, 2011

Listen up. I do not like fine dining. Give me a big ass steak or anything wrapped in bacon and I will rip that shit up. I've always been a baker, but I don't feel like baking requires any type of skill. It basically comes down to science and a test of how well you can follow directions. Note: I do not think that I am an amazing chef. I am not the next masterchef. The last few years however, I have experimented a lot with recipes and come up with a few of my own. Some of them have been disasters, and some have been really REALLY good. So introducing Operation Yum: an attempt to showcase my favorite recipes as well as continuing my quest for finding delicious food with my style of cooking- homey with minimal fluffy bullshit. I hope you'll try these recipes for yourself and let me know how they work out for you. Thanks for stopping by. Jen